Manual ATDW Editor Support Guide
How to create ATDW tile with our Manual Editer
Head to your website and type /admin at the end of your web address in the address bar.

Fill out your email and password in the admin section to log into the admin panel.

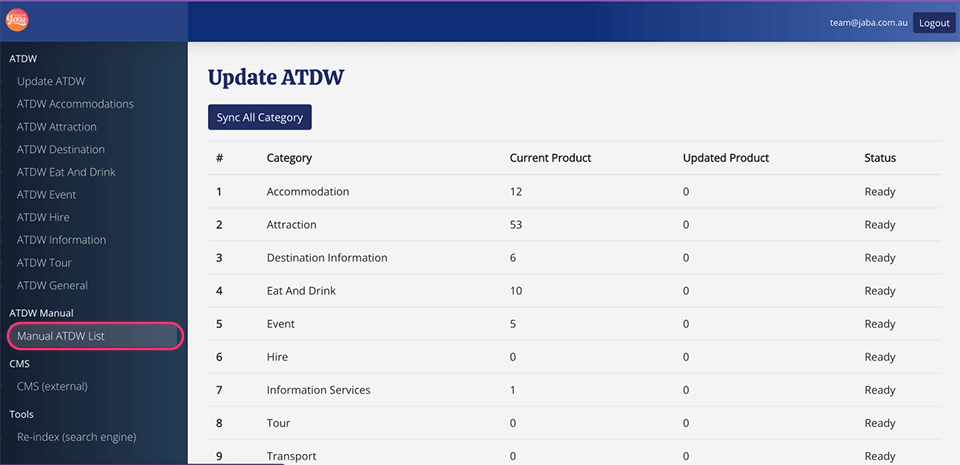
Click on the Manual ATDW List (listed underneath the Manual ATDW heading).
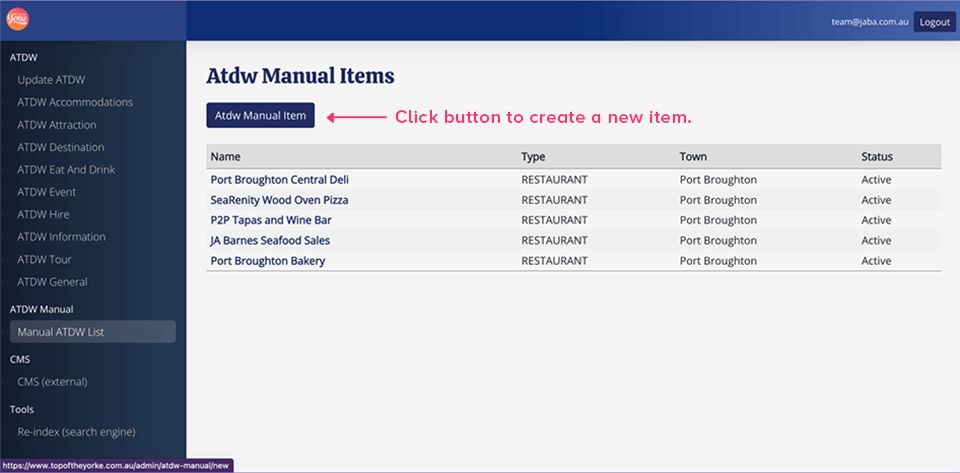
Click the ‘ATDW Manual Item’ button.
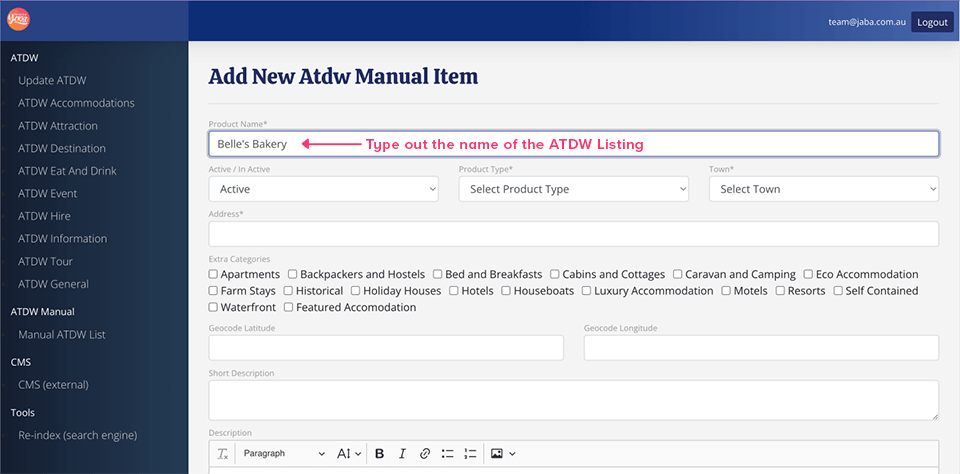
Fill out the relevant text fields related to the business, location, or event you are creating the ATDW listing for.
Product Name*: The product name refers to the name of the ATDW listing. This may be the name of a business, location, or event. Enter the name of the ATDW listing by selecting the text field beneath ‘Product Name’ and typing it out.
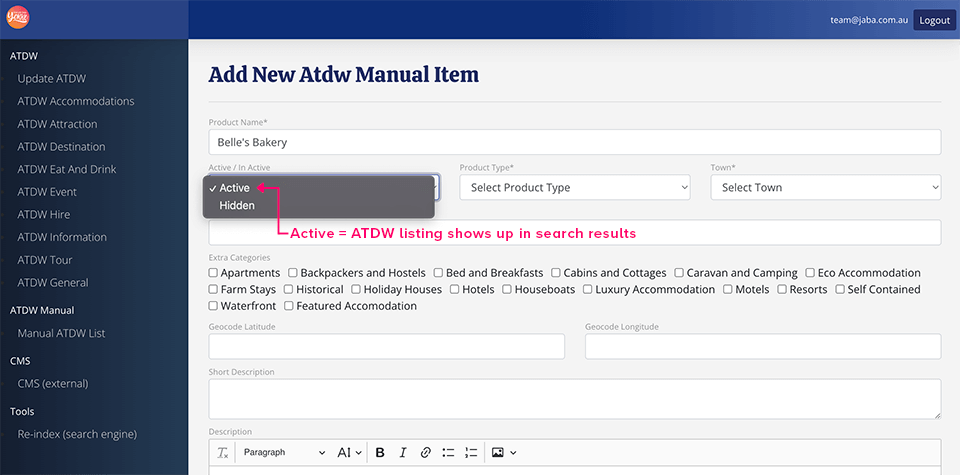
Active/Inactive: Active/inactive refers to whether your listing will show up in search results. Click the dropdown menu and select ‘Active’ to make sure your ATDW listing shows up in the search results. To hide your listing, select ‘Hidden’ in the dropdown menu.
Product type*: Product type refers to the category you are creating the ATDW listing for e.g., eating out or accommodation. To choose an option, select the drop-down menu under ‘Product Type’ and select one of the listed options.

Town*: In this drop-down menu, you will be required to select the town in which your ATDW listing occurs. To choose a town, select the drop-down menu and click from one of the options listed.
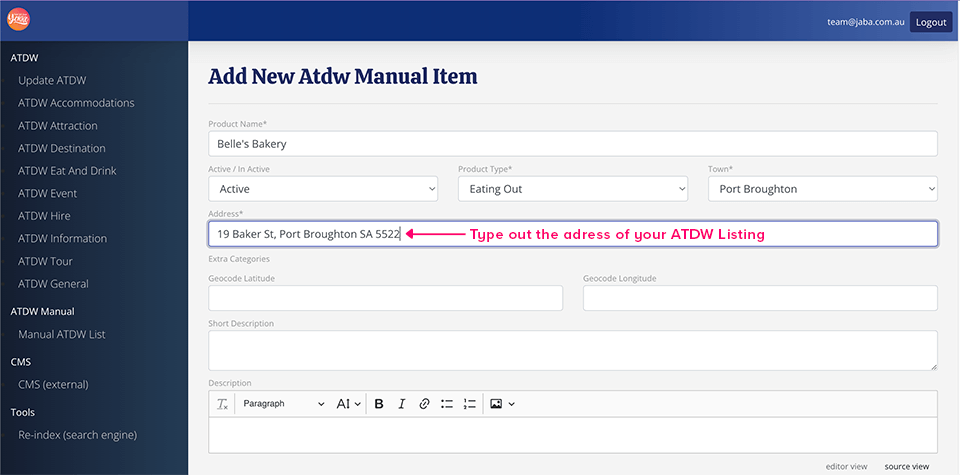
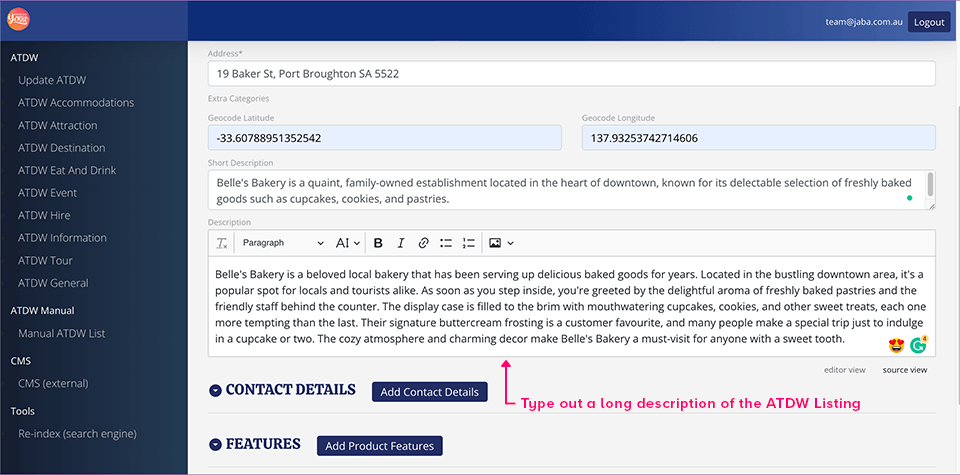
Address*: In this text field, you will be required to type out the address of your ATDW listing. Enter the address of the ATDW listing by selecting the text field beneath ‘Address’ and typing it out.
Extra Categories: If your ATDW listing is related to more than one category, you can check additional boxes listed under the Extra Categories heading to help yield better search results. For example, If you have accommodation as the product type of your ATDW listing, you might select ‘apartments and hotels’ as extra categories. Please note that these categories are optional.
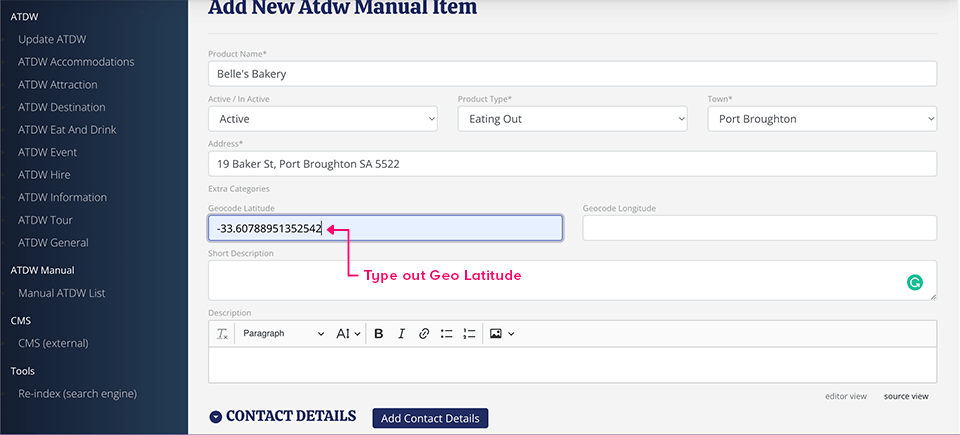
Geo Latitude: Latitude is the measurement of distance north or south of the Equator. Enter the Geo Latitude of your ATDW listing by selecting the text field and typing it out.
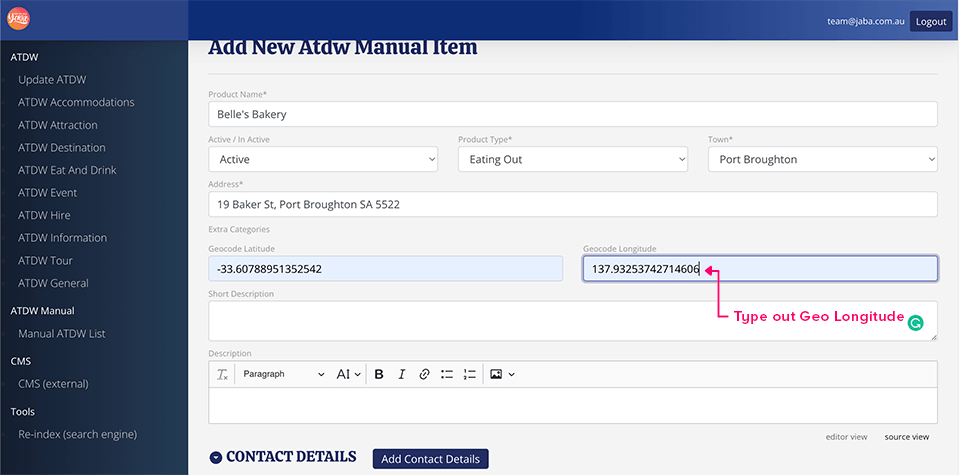
Geo Longitude: Longitude is the measurement of distance east or west of the Equator. Enter the Geo longitude of your ATDW listing by selecting the text field and typing it out.
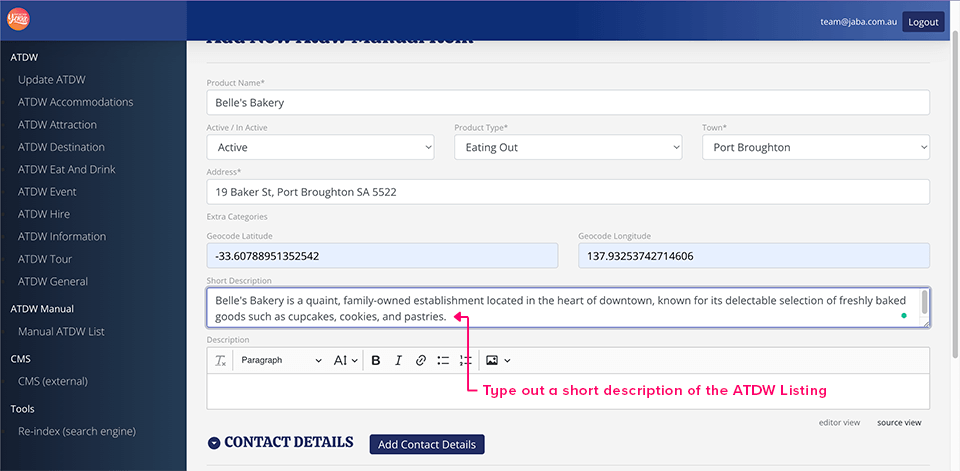
Short Description: This text field requires you to type out a short description (1-2 sentences) of your ATDW listing so that website goers can briefly read about your listing before clicking on it. Enter the short description of your ATDW listing by selecting the text field and typing it out.
Description: This text field requires you to write a long description (1 or more paragraphs) regarding your ATDW listing, so that website goers can read what it is about. Enter the description of your ATDW listing by selecting the text field and typing it out.
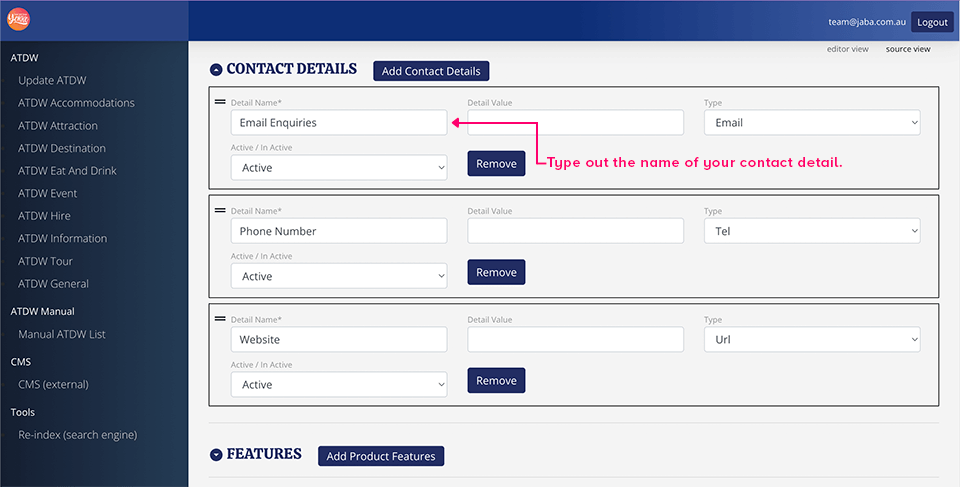
After filling out most of the information about your ATDW listing, you must next enter the contact information. Click the arrow beside ‘Contact Details to drop-down the relevant text fields.
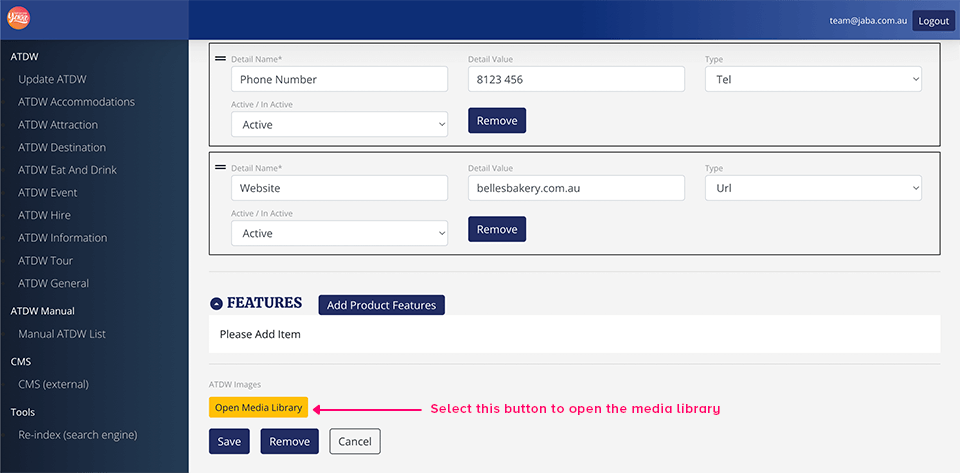
Beneath the contact details heading you will be able to enter 4 types of contact information. These include a mobile number, a landline number, an email address, and a website URL. Each piece of contact information is segregated by a box with a black outline containing 2 text fields and 2 dropdown menus.
Detail Name: The detail name is the heading you will give your contact details. For example, in this text field, you might put one of 4 headings: Email Enquiries, Telephone Number, Mobile Number or Website URL.
Detail value: detail value refers to the exact contact information you will use. In the text field beneath ‘Detail Value’, you will type in one of four options: an email address, a website URL, a mobile number or a telephone number.

Type: Under this drop-down menu, you will be required to select one of four options for your contact detail so that an action occurs if it is clicked. The option you select will depend on the contact detail. The TEL (mobile & landline) option will prompt a phone call if the phone number is clicked upon. The Text (mobile only) option will prompt a text message when a mobile number is clicked. The Email option prompts a new email if an email address is clicked. Lastly, The URL (website) option will take the user to a website if the web address is clicked.
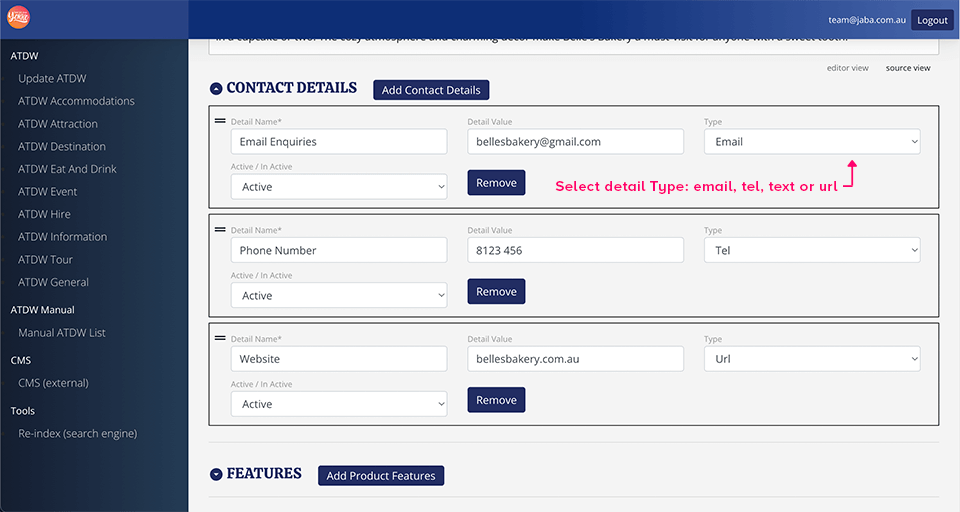
Active: This category will ensure that your contact detail is shown on the ATDW listing. To make a contact detail active, select ‘active’ in the drop-down menu. To hide a contact detail, select ‘inactive’.

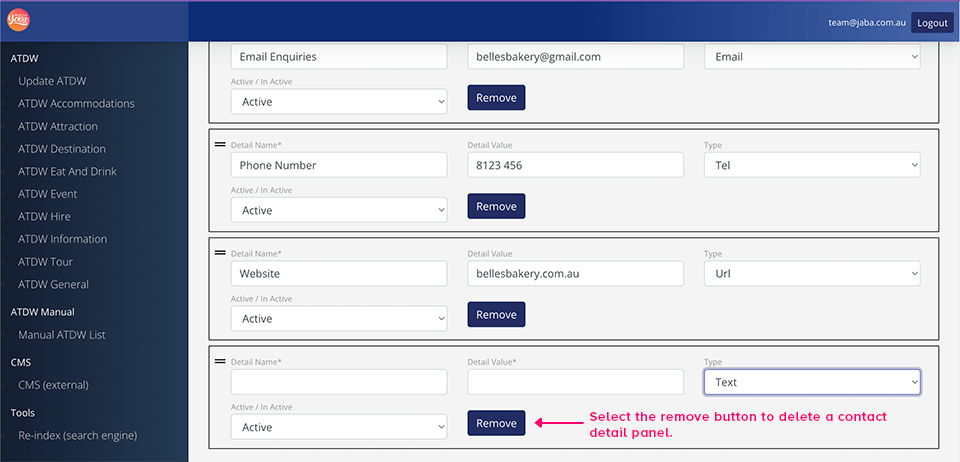
Some ATDW listings might require more than one type of contact detail e.g., multiple emails, phone numbers or web addresses. To add another piece of contact information, click the ‘Add Contact Details’ button and a ne conatct deatil panel will appear.

If you wish to remove the contact information from the ATDW listing, simply click on the ‘remove’ button in the contact details box and the box containing the text fields and drop down menus will disappear.
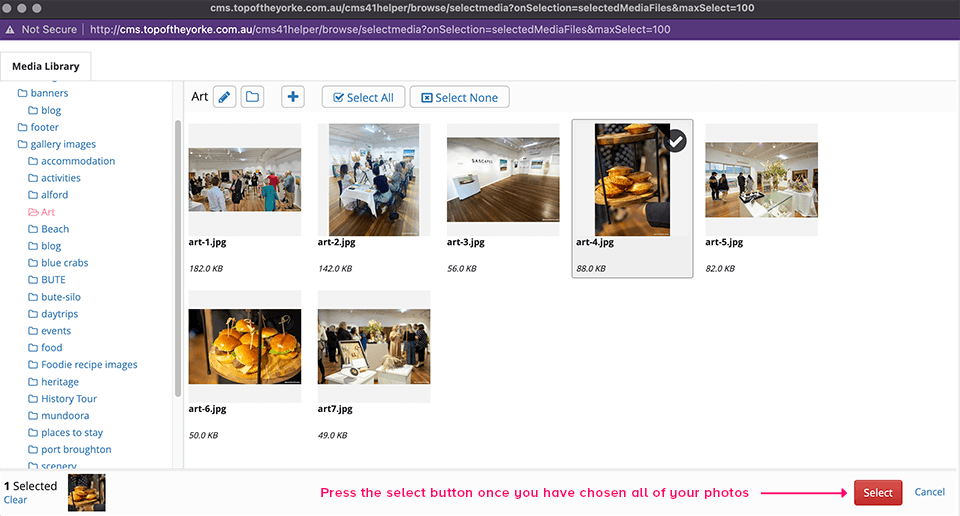
Lastly you will need to include some pictures of your ATDW listing. To do this click the ‘open media library button’ and the media library will appear on your screen.
Next, click on a file in the media library and select your images. Once you have finished press the ‘select’ button and your images will appear beneath the ATDW Images heading.
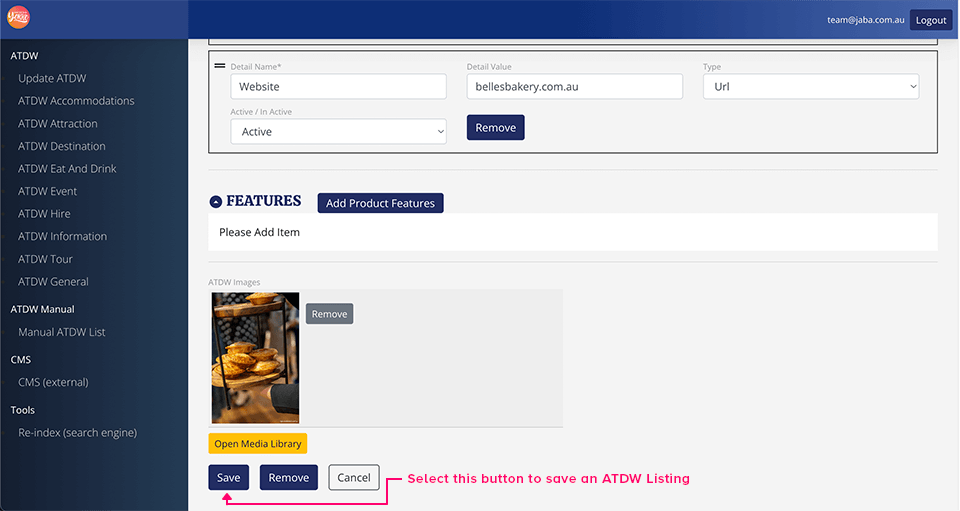
If you wish to remove an image, simply click on the grey ‘remove’ button next to the picture you want to delete and the picture will disappear.

Once you have finished your ATDW listing click on the ‘save’ button. If your ATDW listing is saved you will see it appear in the manual ATDW list.
![]()


